SDK Installation
Follow the guide to set-up Flutter SDK integration
Steps To Add Dapi To Your Project
1. Get Your API Key AppKey
- To start using Dapi APIs, log in or create an account at Dashboard.
- Follow instructions about getting your AppKey.
2. Set up Backend Server
-
Important! Using the SDK requires configuring a backend server. Read more about the flow and requirements: Server set-up for SDKs. For development purposes, the server can be easily set up on your local machine.
-
Once the server runs successfully, make sure to add the host URL as
App Server URLon the Dapi Dashboard
Now the SDK will automatically know where to send its requests!

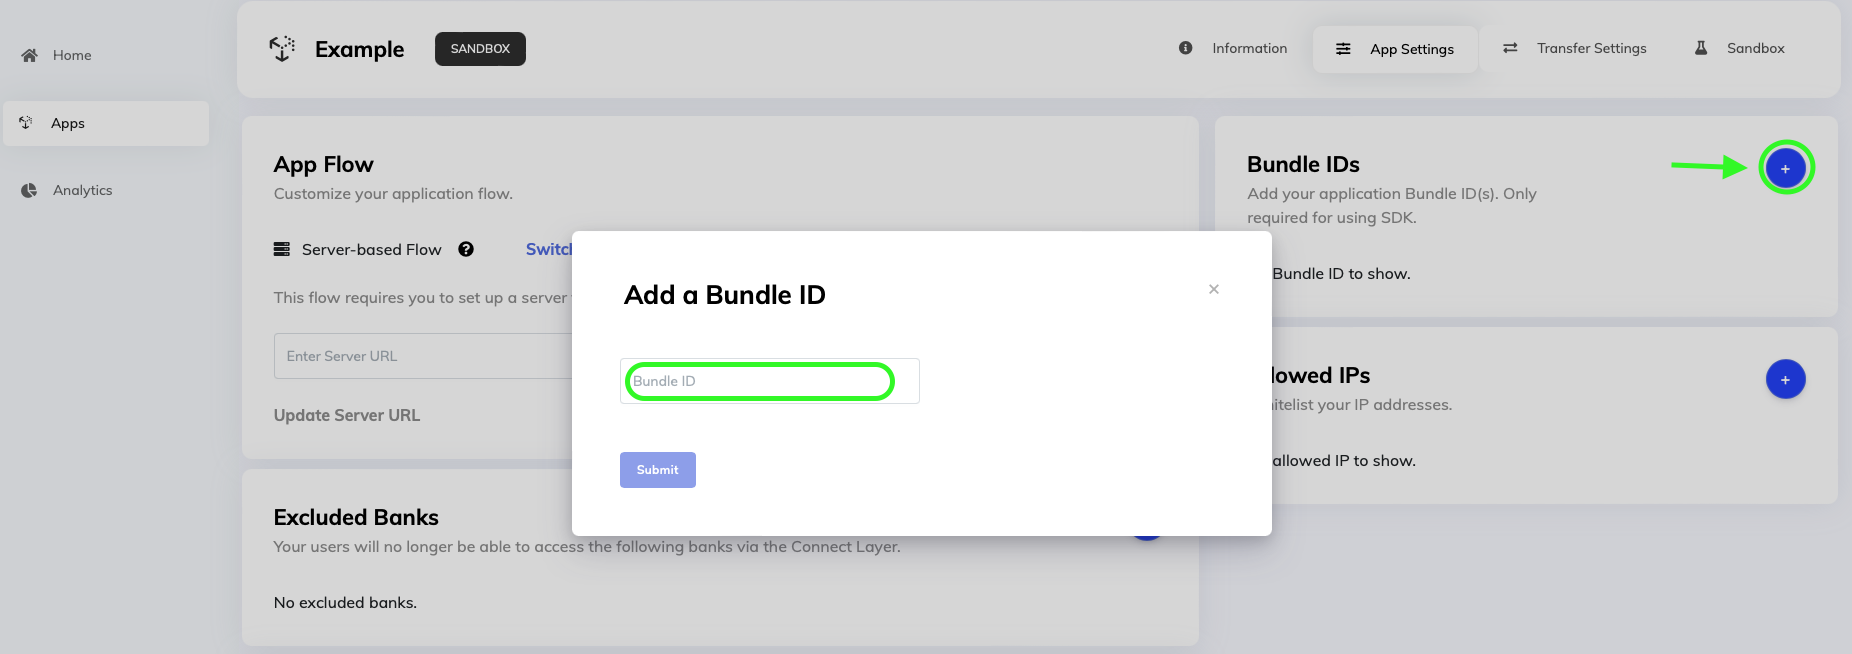
3. Add Project Bundle ID to Dashboard
For Android:
- Open your build.gradle file
- Copy the value of applicationId

- Open your app in the Dashboard.
- Select your Application → Go to App Settings
- Click on the Bundle IDs + icon, paste the Bundle ID value, and click Submit

For iOS:
- Open your .xcodeproj file
- Copy the value of Bundle Identifier

- Add it to the dashboard too If it is different from your Android applicationId
Install Dapi Flutter SDK
To integrate Dapi into your Flutter project, install dapi using the following command.
flutter pub add dapiUsage
- Import Dapi
import 'package:dapi/dapi.dart';- Start the SDK
await Dapi.start(
  "#app_key#",
  "#client_user_id#",
  )
);-
Replace
app_keywith your appKey from the first step. -
ClientUserIDis used to distinguish between different end-users. The value forclientUserIDneeds to be set by you. We recommend settingclientUserIDto your actual user ID that you use to distinguish between users.
Example
Clone this repository, run the application and see Dapi in action.
Updated 8 months ago